This page includes an overview of some of the tax return preparation steps. For the full, detailed workflow, see the tax workflow.
The Tax > Compliance list page is where you'll create, access and keep track of the progress of your client's tax returns.
Adding a tax return
If you had a return for your client for the previous year on 31 March:
A tax return entry with a Not started status for this year is automatically created for the client. You can click anywhere in the Not started entry row to roll over return details from the previous year to the current year's return.
You can also add a new tax return for a client and roll over return details from the previous year. You must configure the client's Compliance settings first, to ensure the tax return is created with the right client details.
If there isn't already a tax return in Practice Compliance, you can still add a return. If a return existed for the client in the previous year, data will roll over data when you add the return. If there's no return in the previous year, you can manually add and complete the return.
Tips for adding a return
If you make a mistake when adding a new tax return, you can always delete and re-create it. When you delete a tax return, the amount to be paid in the tax notice is reset to zero - tax notices won't be deleted. If the tax notice has a status of Sent or Paid, then no changes will be made to the tax notice. Only MYOB transactions for the compliance period are deleted.
Use an automatically created tax return
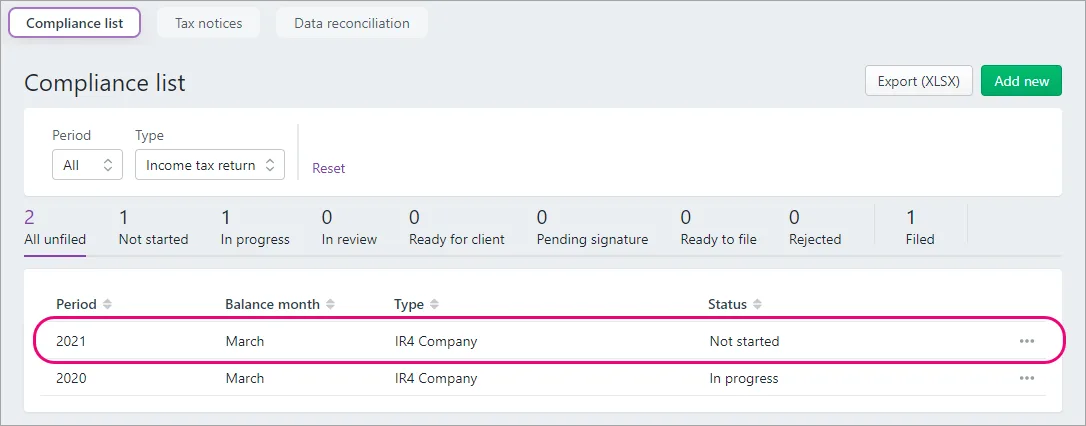
A tax return entry for this year is only available if a return existed for the client on 31 March.
Go to Compliance list > Tax return.
Find an entry for this year with a Status of Not started, and click anywhere in the row. The Ready to start the new period? prompt appears.
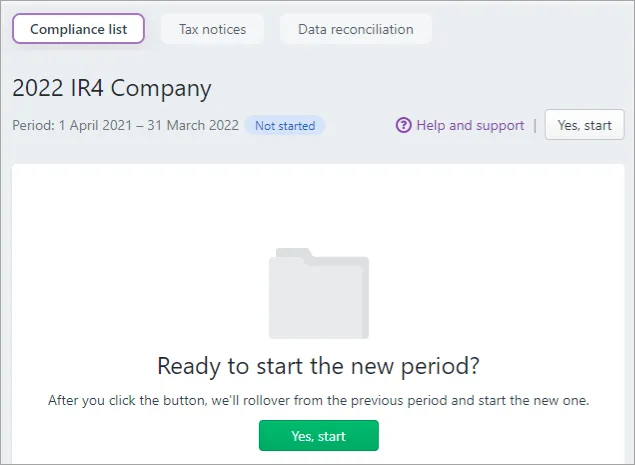
Click Yes, start. The tax return opens and any available data is rolled over and pre-populated.
Review the rolled-over data. There may be some instances where the rollover creates entries that you need to remove in the workpaper or schedule.

Add a new tax return
Before you begin
Make sure you have:
-
a tax agency in your Practice Compliance settings.
-
configured your client's Compliance tax settings and linked a tax agency to them.
Go to Tax > Compliance list and click Add new. The Add new dialog box appears.
Select a client from the Client drop-down.
If you haven't finished setting up the compliance settings for your client, you might receive the following message:

Click configure the compliance settings to finish setting up your client's compliance settings.
Select the type of tax return you want to add from the Type drop-down
Select the period you want to create the tax return for, from the Period drop-down.
Click Add. The tax return opens and any available data is rolled over and pre-populated. The tax return also appears in the Compliance list.
Review the rolled-over data. There may be some instances where the rollover creates entries that you need to remove in the workpaper or schedule.

Open a tax return
Go to Tax > Compliance list.
Click the entry in the list for the return type and compliance period you want to open.
If you're viewing the list in All client's view, use the filters along the top of the page to make it easier to find a return for the right client.

Delete a tax return or IR526
You can delete a tax return with any status other than Filed.
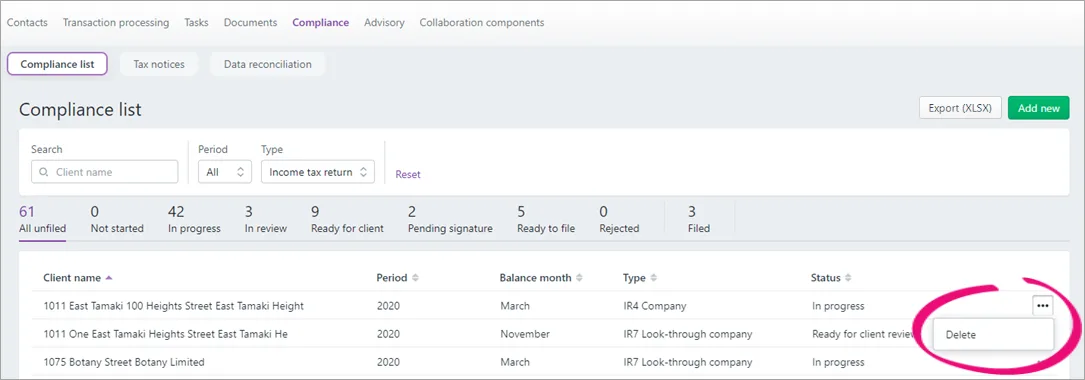
Go to Tax > Compliance list.
Click the ellipsis button (...) next to the return you want to delete.
Click Delete.

Amend a tax return
The tax return can't be amended through Tax in Practice Compliance if it has already been filed with IR. This includes returns that have been filed through Tax or an alternative method, including IR's automatically issued income tax assessments.
If the return needs to be amended, you need to file the amendment in myIR.
Entering data into a tax return
Once you've added a tax return, you can enter data into the return. We'll pre-fill some of the fields in the tax return with provisional tax data from tax notices and transactions from Data reconciliation. Some data is also pre-populated and you can distribute data between returns.
Once you approve the tax return, it will be locked to prevent changes unless you send it for rework. Once the return is filed, you can't make any further changes.
Completing fields
Here are some helpful things to keep in mind when completing fields in different types of tax returns.
General tips
The top of most tax returns will display Taxable income/(loss) and Residual income tax. Field descriptions in the return let you know which fields are being used to display the information at the top of the return.
We recommend working through the tax return in the order it's displayed.
Use the Navigation options on the left of the tax return page to jump straight to the section you want to view or update. You can also use your browser's keyboard shortcuts to navigate the page.
To help with reviews, you can add comments to tax returns.
To attach correspondence, you must use myIR secure mail. This is an Inland Revenue requirement. See the Document service section of IR's Gateway services page.
You can add associations from existing stored details.
Provisional tax tips
The provisional tax 50/50 split information displayed on the tax return comes from the year-based Compliance settings section of Client settings. If you applied this setting, the tax statement will also include a note at the provisional tax amounts, explaining that a 50/50 split is applied.
The 50/50 split will only be reflected in existing tax notices, returns and statements if they are in progress and aren't locked. When you file the return, the setting for the start date of taxable activity is sent to IR along with the provisional tax amounts, but the other 50/50 split settings aren't sent.To change the provisional tax option from standard to estimation:
Go to the provisional tax notice.
Select standard or estimation.
In the tax return, click Sync tax return data.
Learn more provisional options.
Tax notices currently don't support the AIM or ratio method. If your client's on one of these methods, select Standard in the tax notice and select AIM or ratio in the tax return.
Transfers of tax paid or refunds
Where you need to move tax refunds or payments to either another tax period or another taxpayer, you need to create the transfer and then sync the tax return for both clients to share the data within Practice Compliance.
If you're trying to stop an overpayment from being refunded, you'll need to transfer this to a future period, whether this is to the same client or another client. For example, if you're in a 2021 return, if you transfer into a 2022 period. In previous years there was a
field called Transfer to provisional tax. This is no longer available, so you'll need to fill out all the details to transfer to future periods. Once you've done this, click Sync tax return data to update the Provisional tax paid field in the tax calculation.Up to 20 transfers are allowed to all tax types and any taxpayer.
Where a transfer is included in a tax return, correspondence isn't required as this will be processed as part of the tax return.
The transfers sections will only be visible if there is a refund.
To understand the date that will be applied to the transfer, see the IR website.
It's important to complete these steps as one process, as these transactions are considered draft transactions and won't show in Data reconciliation until the tax return has been filed. You can add the Transfers received schedule to see where the transfers are coming from.
To transfer tax paid or refunds:
Create the transfer in the first tax return.
Click the Sync tax return data button.
Open the receiving return. If not created, create it at this point.
Click the Sync tax return data button.
Use of money interest (UOMI)
IR3, IR3NR, IR4 and IR6 only
You can include Use of money interest (UOMI) in the tax return so that it appears in the tax statement for your clients. UOMI isn’t sent to Inland Revenue (IR).
For pre-2022 tax returns, you can manually calculate and enter the UOMI amount in the UOMI amount field in the Tax calculations section.
For 2022 tax returns onwards, you can include UOMI using the built-in UOMI calculator. Or you can completely override the calculation to enter your own manually calculated UOMI amount. The UOMI calculator uses Residual Income Tax (RIT) from the tax return and a date span to work out the UOMI amount.
To include UOMI:
Go to Tax > Compliance list > Tax return and open the IR3, IR4, IR6 or IR3NR tax return.
To ensure the calculation uses the latest data transactions, click Sync tax return data.
In the Use of money interest (UOMI) section, at Include UOMI?, select Yes.
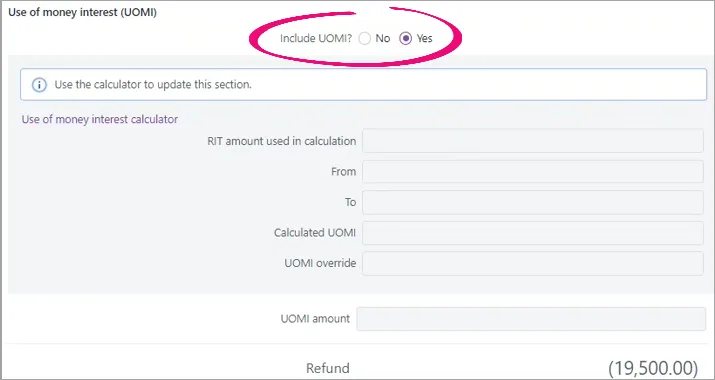
-
The fields in the Use of money interest (UOMI) section will be updated when you apply your changes in the calculator.
-
If you previously entered your own manually calculated UOMI amount using the previous version of the UOMI field, you’ll also see a UOMI amount (previous manual version) field for your reference. But if you want to include the UOMI amount in the tax statement, you need to continue with these steps use the new UOMI calculator fields.
-
Click Use of money interest calculator.
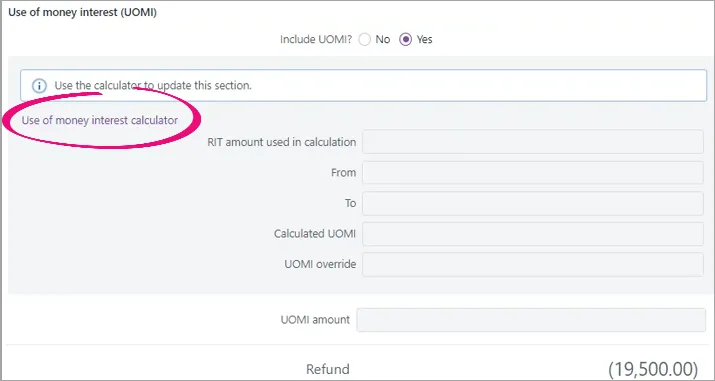
The Use of money interest calculator dialog appears.
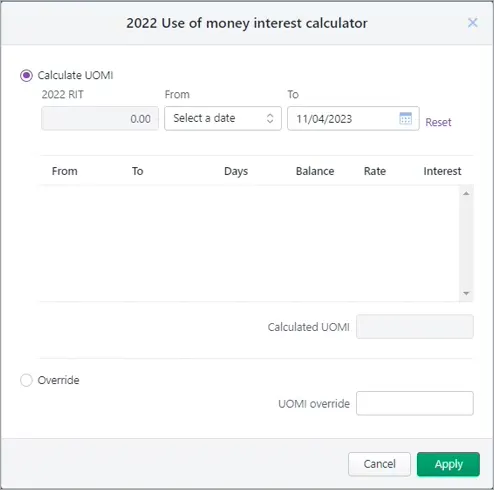
To automatically calculate the UOMI amount, select Calculate UOMI and select a From and To date.
The available From dates are the day after the provisional and terminal tax dates.
The default To date is the terminal tax due date.To manually enter a UOMI amount, select Override and enter your own UOMI amount in UOMI override.
Click Apply. The Use of money interest calculator dialog closes and the values are displayed in the Use of money interest (UOMI) section of the tax return.


If RIT changes, or if RIT is over 60,000 and you haven't calculated UOMI, you'll see a message at the top or the page when you validate the tax return, alerting you to check the calculation.
Government subsidy
IR3 and IR3NR only (2022 onwards)
The amount must be the total COVID-19 wage subsidy scheme (WSS), leave support scheme (LSS) and short-term absence payments (STAP) received where tax wasn't deducted, minus any repayments. Any amount pre-populated from IR will be the net amount IR held at the time the return was created.
Update the amount if it's incorrect. Don't include resurgence support payments (RSP) here. Business expenses should be reduced by the total RSP amount.
Overseas income
IR3 (2022), IR4, IR8 and IR9 only
The Overseas income schedule automatically calculates the claimable New Zealand tax credit portion of overseas tax payments. The automatic calculation is based on the assumption that all income is from the same segment. If there are different income segments calculated at different rates, you'll need to override the automatic calculation with your own manual calculation.
To use your own calculation, select Yes at Override tax credits claimable? and enter the amount in Tax credits claimable override.
IR1261 Overseas income summary attachment
IR3 (2023 onwards)
The IR3 Overseas income schedule is replaced by the IR1261 Overseas income summary attachment. You must attach an IR1261 when filing an IR3 individual tax return containing overseas income. Add the IR1261 attachment from the IR attachments drop-down in the Tax return page or from the link at the overseas income field.
The IR1261 has a worksheet and a summary. Only the summary is filed with IR. Enter each income type for each tax jurisdiction separately. Enter the information in the worksheet, and the summary will group any duplicate entries. If you don't know the tax jurisdiction that the
income was earned from, you can select Unknown. The summary will automatically calculate the allowable tax credits, but you can override them by clicking the pencil icon at Tax credits claimable. You can always click the reset icon (a circle with an arrow) to change
the edited amount back to the automatically calculated amount.
When you print the tax statement, the overseas income summary will be included, but the worksheet is optional. The attachment also lets you choose whether you want to print the worksheet as well.
Income/(loss) attribution
IR7 Partnership or look-through company return only
In the Income/(loss) attribution section, the Attribution of income/(loss) percentage amount is automatically calculated and distributed. But you can edit this automatic calculation, which is useful if the distribution isn't percentage based and you want to specify the amount to be allocated.
You can tell which fields have been edited by checking the icon next to the field.
-
If the field has an edit icon (a pen), the field hasn’t yet been edited and is using the automatic calculation.
-
If the field has a reset icon (a circular arrow), the field’s automatic value has been edited and is using a manual value.
You can always click the reset icon to change the edited amount back to the automatically calculated amount.
Validating distribution balances
If you edit a value in the Attribution of income/(loss) section, other fields are not adjusted automatically, including the Attribution of income/(loss) percentage field. So you need to make sure the distribution amounts are still correct.
Use the Validate button to see if there are any errors to fix with your new distribution allocation. Validating tells you if there are any errors and indicates what is causing the error based on the field you edited and value you entered. For example, whether it’s to do with interest or dividends, and whether it’s to do with under or over allocating income.
Validation example
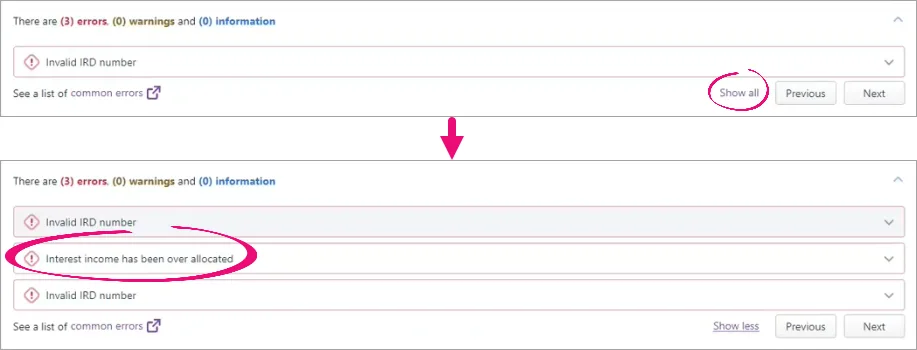
If you change the automatically calculated Interest amount and click Validate, you may see an error at the top of the page saying that Interest income has been over allocated. This indicates that you may need to go back to the Attribution of income/(loss) section and edit the interest amounts for other partners.
To avoid IR rejecting your return, fix these errors before you file the return.
Editing income/loss attribution
To edit a calculated amount:
Go to Tax > Compliance list > Tax return and open an IR7 return.
Go to the Attribution of income/(loss) section.
Go to the field you want to edit and click the edit icon (a pen).
Enter your new value and click ENTER.
Only the field that you edited is changed. No other fields are adjusted based on the amount you entered.
Edit any other amounts that you may need to adjust to make sure that the amounts are balanced.
For example, do you need to change the Attribution of income/(loss) field percentage as a result of the new value that you edited? Or if you edited, say, the Interest field, do you need to edit the Interest field for other partners?
To check if the new distribution is correctly balanced:Click Validate on the top-right of the page.
Click Show all to make sure you see all the errors.
Fix any errors caused by your edited amounts by updating amounts in other fields in the Attribution of income/(loss) section that your edited amount may have impacted.

To reset your override amount to the original calculated amount, click the reset icon (a circular arrow) next to the field that you overrode.
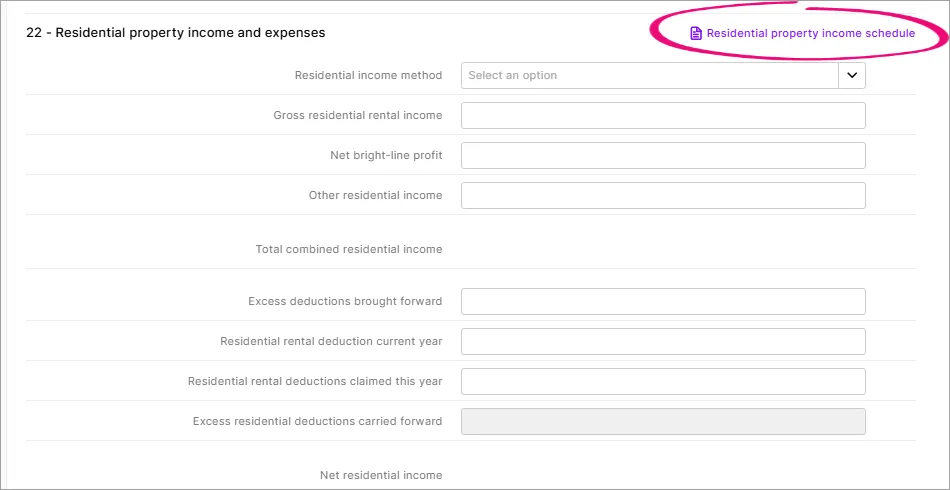
Residential property income
IR7 only
IR requires that IR7s only include the residential property income at Total income/(loss) after expenses and not the residential rental deductions. The printed tax return follows the IR guidelines and looks the same as the tax return interface because the distribution to partners must be a portion of the original amounts not the net amount. Whereas the tax statement is designed to be customer-facing and displays residential rental income less residential rental deductions.
Distribution summary
IR4, IR6 and IR7 ony
A distribution summary in the associations section lets you easily see which associations exist and some of their key details. For example, this is the beneficiary distribution summary in the IR6:

You can add, edit or delete from the summary or from the beneficiary, settlor, shareholder, partner or owner section. Changes you make to the fields will be updated in the summary and the relevant section.
If you select Yes on the print option, the summary is included on the tax statement PDF report before the relevant association's usual list of information. The summary is not filed to IR.
IR4J and IR8J
IR4J annual imputation return and IR8J annual Māori authority credit account return only.
From the 2024 tax year, the opening balance is pre-populated from the prior year's IR4J or IR8J closing balance held by Inland Revenue.
For earlier years, or if you need to modify the balance, enter the amount as a negative value for a credit balance or a positive value for a debit balance.
IR6
In an IR6, there's a Total trustee allocation column to the right of the beneficiary income and tax credits fields. Any amount not allocated to beneficiaries will appear in this column and will be allocated as trustee income. Both KP21 Income allocation fields will now be automatically calculated.
However, if the IR6 is for a foreign or non-complying trust and there are taxable distributions to beneficiaries, they'll also display in the Total trustee allocation column. If you don't allocate the full amount, any remainder won't be allocated as trustee income.

IR9 Clubs or societies return
The IR9 has three entity types, and all schedules related to the IR9 are available in the return. A client's club or society type determines which keypoints appear on the main form. If you add a schedule that doesn't match to a visible keypoint, the amounts from the schedule won't update in the main form. In these instances, you can enter any tax credits directly in the Tax calculation section.
Checking for errors
As you complete certain fields in the tax return, we'll check it for errors. If we detect an error, the field displays red, and a message appears below the field so that you can fix it straight away.

Adding supporting data to tax returns
There are a few ways you can add supporting data depending on the type of data and the section of the return. Add attachments to send to Inland Revenue. Or add a schedule or enter data directly into the main form of the return to help you calculate amounts.
Enter supporting data directly in a tax return
2026 onwards
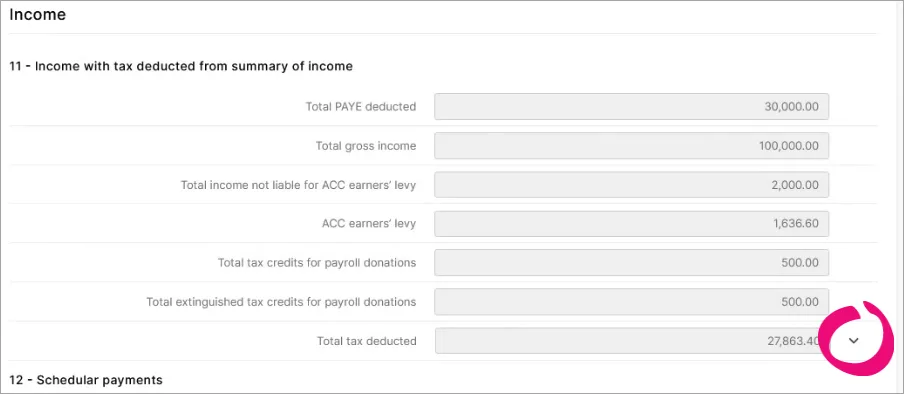
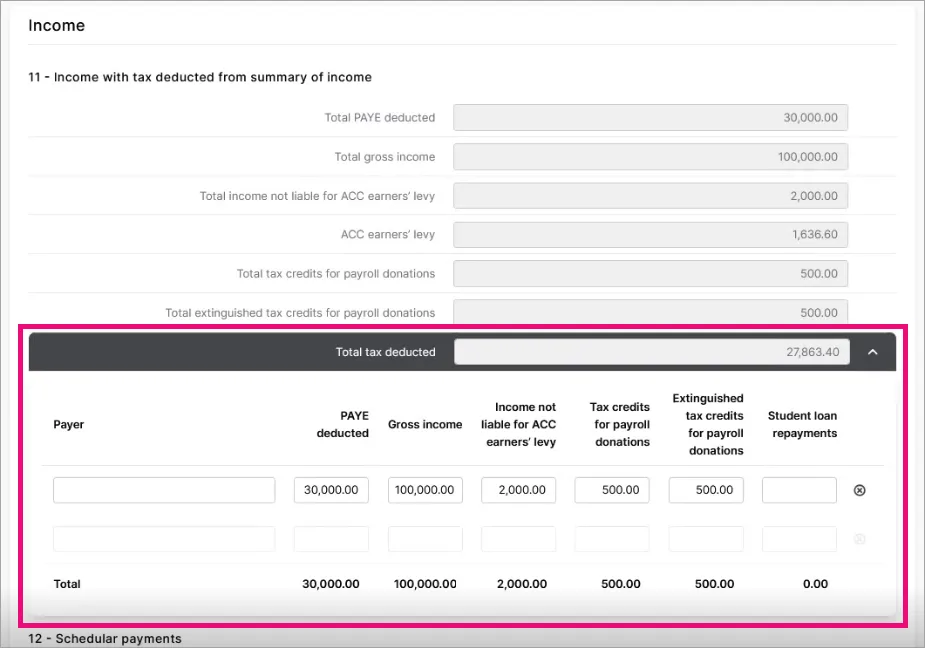
You can expand most sections of the main form of the return to enter and review supporting data directly in the return.

Click the icon on the bottom-right of the section of fields to expand more fields for viewing or entering details. If the fields are empty, the icon will be list. If the fields already have details, the icon is a down arrow.
Pre-populated data and data distributed from another return will be updated into these fields if relevant.
Entering data this way isn't available for attachments, complex schedules and schedules that don’t link directly to a keypoint.
Add an attachment or schedule
You can add tax attachments and schedules. Attachments are filed to Inland Revenue. Schedules are not filed but can be used to help you with your calculations.
Changes you make to attachments or schedules are automatically saved. You'll see a message at the top-right of the page when changes are autosaved, letting you know it's safe to navigate away from the page without losing data.
You can view more details about the Student loan schedule and Working for families tax credits schedule.
Either use the suggested attachment or schedule link, or manually find and add the attachment or schedule.
To use the suggested attachment or schedule link:
Click the link in the section of the tax return that you want to add an attachment or schedule to.
In the Related attachments and schedules window, select the attachment or schedule and click Add.
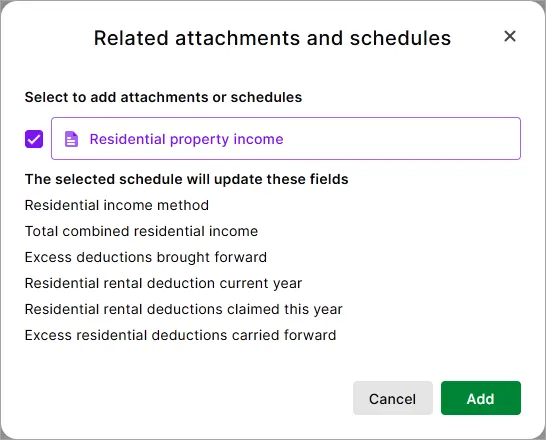
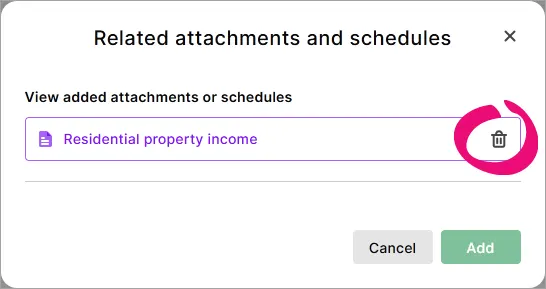
If you want to open the attachment or schedule that you've added, click the link with the attachment or schedule name in the Related attachments and schedules window. Otherwise click Cancel to close the window.
To manually find and add the attachment or schedule:
On the panel next to the return, click Attachments & schedules to expand the options.
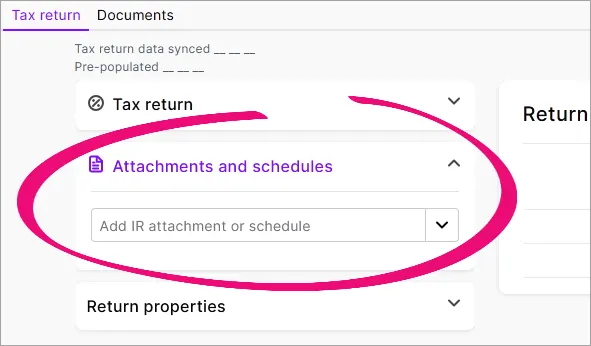
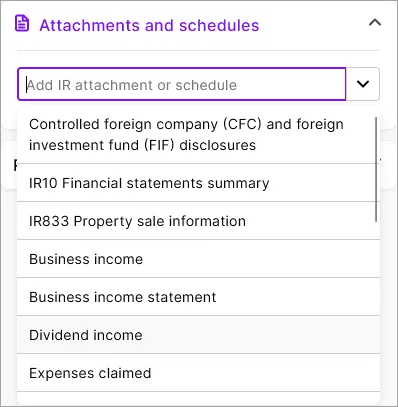
Click the Add IR attachment or schedule drop-down and select the tax attachment or schedule you want to add.
You can view which attachment and schedules you've added to the return by clicking the links in the tax return sections, or by expanding Attachments and schedules in the panel next to the return.
Go to the Tax > Compliance list page and open the tax return.


Delete an attachment or schedule
To delete supporting data that was entered directly in a return (2026 onward):
Click the down arrow next to the fields in the return to expand the supporting data.
Delete data from individual fields or click the delete icon (x) at the end of the row to delete the row.
To delete an attachment or schedule:
Go to the Tax > Compliance list page and open the tax return and either:
Click the attachment or schedule link in the tax return and click the delete icon (the rubbish bin) in the Related attachments and schedules window.
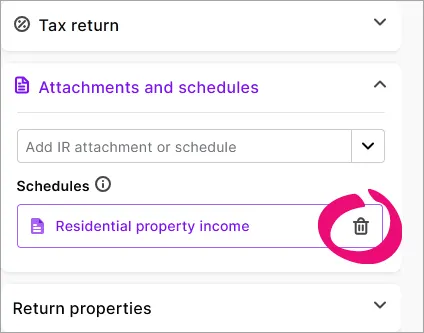
Or on the panel next to the return, click to expand the Attachments and schedules options and click the delete icon (the rubbish bin).
Syncing data
As you progress through the tax return workflow and statuses, some data will sync between the tax return, tax notices and data reconciliation. But you can sync this data at any time.
Sync tax return data
To sync data at any time, click the Sync tax return data button. This button sends information between the tax return, tax notice and data reconciliation to make sure all the data matches.

When you click Sync tax return data, the following information is synced from the source to the destination:
From source | Status | Status information | Information updated | To final destination |
|---|---|---|---|---|
Tax return | Pending client signature | (Send to client button clicked). You can trigger this to happen sooner, while in draft, by clicking the Sync tax return data button. | The transfer information, taxable income, RIT and other tax information from the current year tax return. | Provisional tax return (must be in progress) |
Tax return | Pending client signature | (Send to client button clicked). You can trigger this to happen sooner, while in draft, by clicking the Sync tax return data button. | Draft transactions are created. This happens in the background and is not shown. | Data reconciliation |
Tax return | Filed | File the tax return before completing the notice. | The terminal tax basis will use the filed tax return figures. If you use MYOB AE/AO, a key change compared to the desktop software is the status at which the transactions are being used. Previously, transactions were included when they were approved. Now they'll be included when the return is filed. | Terminal tax notice |
Tax return | Filed | File the tax return before completing the notice. | 1. The provisional tax notice will default to using the RIT from the latest filed return or reconciled assessment. If there's no assessment, the notice will use the unreconciled MYOB RIT transaction from the filed tax return.
| Provisional tax notice |
Data reconciliation | Not applicable | Not applicable | If you add an MYOB transaction, this will be considered expected until it's reconciled. | Tax return |
Data reconciliation | Not applicable | Not applicable | Reconciled MYOB and IR transactions. Grey fields are prefilled and can't be updated manually. | Tax return |
Data reconciliation | Not applicable | Not applicable | All IRD payments, transfers and refunds until the provisional tax notice due date. Summed up and shown as payments and transfers. Unreconciled and reconciled IR transactions are included. If any changes are required, we recommend correcting these with IR. Where this isn't possible, you can adjust the tax notice amount using the voluntary adjustment, which allows a negative amount to reduce the tax payment. | Tax notice (must be in progress) |
Data reconciliation | Not applicable | Not applicable | IRD assessment transactions only flow through to the tax notice where the assessment transactions are reconciled. The latest reconciled assessment is used in the tax notice calculation. | Tax notice (must be in progress) |
Provisional tax notices | Any status | To update the tax return, you must click the Sync tax return data button in the tax return. Otherwise no data will be shared from the tax notice to the tax return. | 1. Provisional tax amounts and due dates. 2. Provisional tax method. | Tax return |
Compliance settings | In progress | The return is not locked. | Tax return |
It's a good idea to click Sync tax return data if you've made changes to the tax return, tax notice, or have new transactions to reconcile, that could change your client's terminal tax payable or refundable.
You can also click Sync tax return data for transferring credits between returns. For example, if you want to transfer credits from an IR526 to IR3.
Validating a tax return
We check for errors after pre-populating and at an individual field level as you complete the tax return. But there may be times when you don't fix the error after pre-populating, and there are errors that we can't detect until you've finished filling in the tax return.
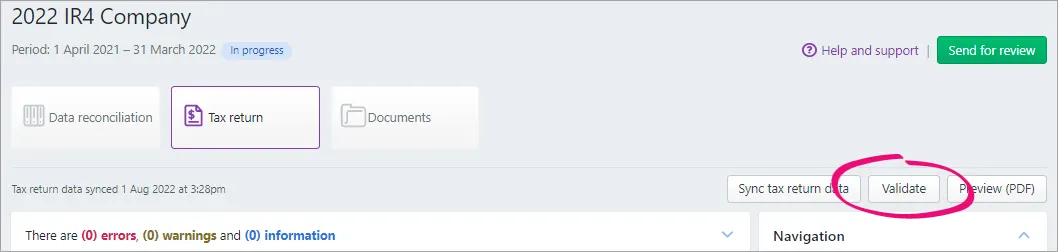
So, before sending the return to your client, click the Validate button. This is an important final check to ensure the tax return has been completed according to the Inland Revenue rules and legislation.
This check looks at the tax return and attachments as a whole and takes into consideration the overall business logic.
To solve common errors that you can receive when validating a return, check the errors and warnings page.
Validate a tax return
In the Tax return page, click Validate. The message "Validating... This may take a few minutes" appears.
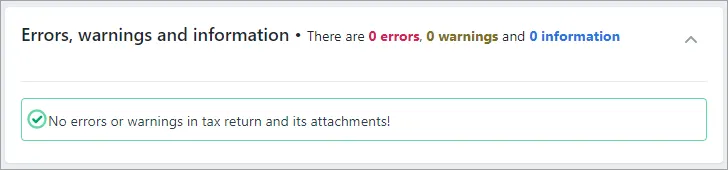
If there are no warnings or errors, you'll receive the following message at the top of the tax return:
If there are errors in the tax return, you'll receive a red alert message instead. For example:
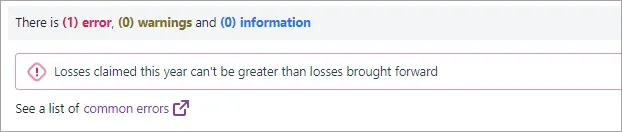
To resolve these errors, click on the error message and you'll be taken to the relevant field, which will be highlighted in red.

Resolve the error and validate again to ensure there are no further errors in the tax return.
Warning messages (displayed in yellow) serve as a precaution only. You can still a file return if there are warnings present, but it's a good idea to double-check the return first. For example:


What's next?
Once you've completed and validated the tax return, it's time to send the tax return for internal review and approval. This is the final check before you send the tax statement to your client for signing.
Even if you don't have a co-worker review your work, you must go through the review and approval steps in order to file a tax return online.
See Sending a tax return to a client for information.