-
Preparing tax notices online in MYOB Practice Compliance has key differences to preparing tax notices in MYOB AE/AO on the desktop.
-
Keep an eye on the tax notice known issues page.
-
You can also view the Data reconciliation workflow and tax workflow. For changes, see what's new in MYOB Practice Compliance.
Preparing tax notices
Tax notices statuses and workflow diagrams
Workflow statuses
Tax notices will progress through the following statuses during the workflow.

Tax notices are locked if they have a status of Ready for client review, Sending, Sent, Paid or Not required.
Tax notices are unlocked if they have a status of Not started, In progress or In review.
Workflow process

Checking IRD numbers
Practice Compliance gives you a few ways to check your client's IRD number:
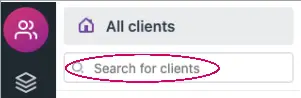
Search for an IRD number on the Client page.
View the IRD number on the Client settings page or on the top right of Practice Compliance when you select a client.
1. Check settings
Before starting, check the details of new clients, including their address, tax settings, tax notice delivery settings and whether notices have been created.
The year-based Tax settings are where you can set up 50/50 split for provisional tax instalments for eligible clients.
Review the delivery preferences of any clients you're not sure of. The delivery preferences are in the tax settings of each client.
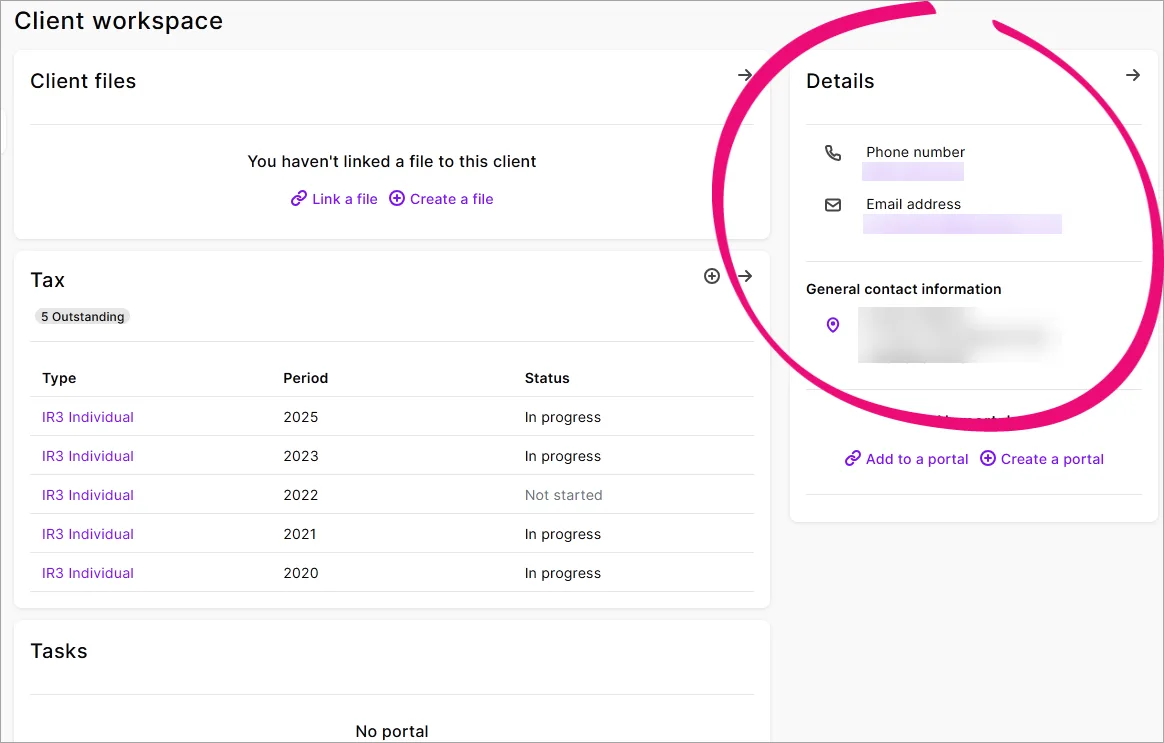
Check client details:
Search for and select the client.
View their details in the Details panel.


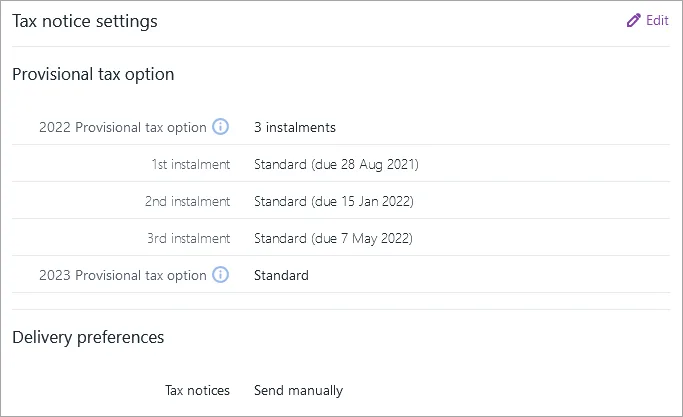
View delivery preferences:
Search for and select the client.
Click the grey cog icon on the top right of the page.


View the Tax notice settings.
Check that your client's email address is correctly entered to make sure tax notice emails are sent and received. If a client's email address contains invalid characters or extra spaces, you can correct the email address by changing it in AE/AO.

Create new tax notices:
Each week, Practice Compliance automatically creates any tax notices that are due within 90 days. You can also create an individual client's tax notices for the entire tax year by clicking Create all tax notices in the message at the top of the Tax notices page. Learn more about Preparing a tax notice.
If the balance month, GST settings, or extension of time in the tax settings need to change, and if this affects the notice dates, contact us to reset the remaining tax notice dates – in Practice Compliance, click the Help button (?) in the left menu bar and select Log a support case.
Update the name on tax notices:
This information only applies if you have both Practice Compliance and MYOB AE/AO.
If you use AE/AO and you've edited your client's name in AE/AO after the tax notices have been created, this will update the name in Practice Compliance using the contacts sync. However, only the Compliance list and settings will be updated. The name won't automatically be updated in the Tax notices and Data reconciliation pages, or the tax notice PDF.
To update the client name, mark the tax notices as Ready for client. This will update the client's name. You can then change the tax notice back to In progress to continue processing it. Subsequent tax notices that have already been created will also be updated.
2. Check if data reconciliation is up to date
Check that all IR assessments have been reconciled.
If you have an IR assessment that you don't agree with, leave it unreconciled. The tax notice calculation won't use this IR assessment.
To view data reconciliation details, go to Tax > Data reconciliation.

For more information on transactions for tax notices, see Data reconciliation workflow.
3. Check unfiled returns
Review tax returns to identify any that should be progressed for filing, so that the return RIT is used in the calculation instead of last year's assessment.
Provisional and terminal tax notices will use the current year’s return calculation when you click Send to client on the return to change the return status to Pending client signature.
Tax notices are populated with return data again when you click File with IR on the return to change the return status to Filed.
To view compliance details, go to Tax > Compliance list.

For more information, see Compliance workflow and Data reconciliation workflow.
4. Filter tax notice view for current notices
In the All clients view of the Tax notices page, use the filters above the list to display the relevant tax notices. This can be useful if you want to see a particular set of tax notices so you can easily perform bulk actions.

Here are some examples of filters you may want to apply:
Display tax notices for the selected date by changing the From and To dates.
Where there are multiple types of notices in the same month, you may need to use the Notice type filter.
To choose whether to see notices with 0.00 amounts, click More filters and select Nil balances.
If you're working in a large practice, you may want to use the filters to display only those clients assigned to you. For example, if you're the practice partner, can use the Partner filter.
To choose whether to display tax notices that are set to Send manually, Send task to client, Send email to client or All, click More filters and select an option from the Delivery preference drop-down.
To choose whether to display tax notices that have Working for families or student loan tax type payments due, click More filters and select an option from the Assessment drop-down.
To display tax notices based on whether the client is using tax pooling, click More filters and select an option from the Tax pooling drop-down. (Learn more about tax pooling for provisional or terminal tax notices.)
To display tax notices based on which provisional option they use (only standard, only estimation or all tax notices regardless of whether they are provisional tax notices), click More filters and select an option from the Provisional tax option drop-down.
To choose whether to display tax notices that have a voluntary adjustment, click More filters and select an option from the Voluntary adjustment drop-down.
Learn more about filter options.
You may also want to apply filters before exporting the data to Excel.
You can filter by partner, manager or other staff, as long as the the practice staff is recorded as Team member in MYOB AE/AO. The Staff member drop-down includes names of staff who are recorded on the MYOB AE/AO desktop's Responsibility tab Team panel for a client. The drop-down shows their name and role, as defined on any client’s Responsibility tab. If you see names repeated, this is because they're recorded with multiple Team roles in AE/AO. Learn more about Team responsibility.
Once you've started work on tax notices, you can further filter by the notice status, but initially all notices will be in the Not started category.
Although tax notices start off with an Outstanding status, they're categorised by a Not started status until someone edits content or changes the status. The Not started status forms part of the overall total that is shown for Outstanding items.
5. Check calculations
Details listed on the Tax notices page list view
Client name
Period – The tax year that the notice is for.
Notice type – provisional tax, terminal tax or student loan.
Basis – Terminal, standard or estimation.
Taxable income – The amount of the taxable income from the Basis being used.
RIT – The amount of the RIT from the Basis being used.
Notice amount – The amount calculated for the client to pay.
Due date – Due date of the tax payment.
Status – The status or stage that the tax notice is currently at.
Comment – You can add comments to tax notices to share information about a tax notice with other users in your practice. This column indicates whether a tax notice has a comment, and lets you add, view and delete comments.
Alerts – Any alert messages to signify a change that could affect the tax notice. For example, that return data is available. See also Understanding alerts.
From the filtered list, you can see the overview of each client’s tax notice calculation, but not the actual detail of how the amount was arrived at. To see the detail, click the entry for the client to open the notice.
Changing statuses
Now that you can see the notices that need to be checked, you can look at the calculation on each notice and decide what to do with it.
Where the same action can be applied to multiple notices, you can select the relevant notices and use the Mark as option to move those multiple notices to the correct status.

-
The Mark as options only changes the status in Tax. For example, if you choose Mark as > Sent, the tax notice won't be sent to the client. To send the tax notice, you need to select the Send to client button next to Mark as.
-
When you open a tax notice:
-
You can click View (PDF) to preview what the tax notice content will look like. The preview will have a Draft watermark. Once you click Approve or Ready for client, the watermark is removed and a copy of the PDF is stored in the Documents tab for that client in Practice Compliance.
-
You can also add, view and delete comments from the opened tax notice.
-
5.1 Identify notices that aren't required
If any notices don't need to be sent to clients, you can mark these as Not required. These are usually notices with nothing due to pay.
Notices for Ratio and AIM clients would also normally be moved to the Not required status. You can't create a list of your Ratio and AIM notices in Tax. You need to maintain an outside list of these clients.
Notices created for partnerships and LTC companies are automatically moved to the Not required status when they're created.
If a notice is marked as Not required accidentally, you can always change it back to any other status.
5.2 Identify notices that can be sent without changes
Notices with correct calculations can be sent without changes. After checking the payment amount and the RIT that it's based on, these notices can be selected and moved to the next stage of the process without further action.
5.3 Identify notices where the basis of the calculation needs to change
The notice amount may be incorrect because it's based on last year's assessment and you've chosen to enter an estimation for this year or you want to use the draft figures from the current year's unfiled return.
You can open the notice and select the basis of the calculation as either Estimation or Standard.
If you select Estimation, you can manually enter the estimation income and tax credits to be used in the tax notice calculation. This estimation will be carried forward to all future tax notices for the tax year.
If you select Standard, the tax notice will use the latest return or assessment to calculate the notice amount.
If the latest figures are from last year, then that year will be automatically selected and an uplift will be applied.
If the latest figures are from the year before last, we’ll use the year before last, and an uplift will be applied.
If figures from neither of these previous years are available, we’ll use the year before last’s return, which will have a Not Started status. Learn more.
If there's no filed return or assessment for the current year, you can manually change the year. The calculation fields will be unlocked, so can manually enter the draft return figures.
5.4 Tax pooling
You may want to use tax pooling to cover the amount due in this tax notice.
You can open the tax notice and select Yes at Tax Pooling.
When tax pooling is selected, there's no longer an amount due on the tax notice, there's no expected payment in the data reconciliation and the amount will be removed from the total tax due for the year.
5.5 Enter adjustments
Unreconciled MYOB transactions such as expected payments are included in the tax notice calculation. You may however want to include an amount from IR on the tax notice that you're leaving unreconciled in Data reconciliation. Or you may want to ask the client to pay more to cover circumstances the IR is not yet aware of.
In these kinds of situations, you can alter the notice amount by adding one or more voluntary adjustments. It's important that you check that amounts in any in-progress tax notices are correct before sending the notice for approval. Learn more.
You can add a voluntary adjustment for each of the INC, SLS, FAM, GST & FBT tax types. INC and FAM adjustments can be for a positive or negative amount.
If you have in-progress tax notices where you've added voluntary adjustments for Working for families or student loan repayments, check the amounts in these tax notices. The voluntary amounts may already be taken into account by the fields automatically synchronised from Data reconciliation. If this is the case, you'll have a duplicated amount from the manual and automatic adjustment.
To fix any affected tax notices, filter the Tax notices list by voluntary adjustments, open the tax notice and click remove to the right of the Voluntary adjustment section in the tax notice. See detailed instructions on removing voluntary adjustments, or learn more about the Student loan or Working for families schedules.
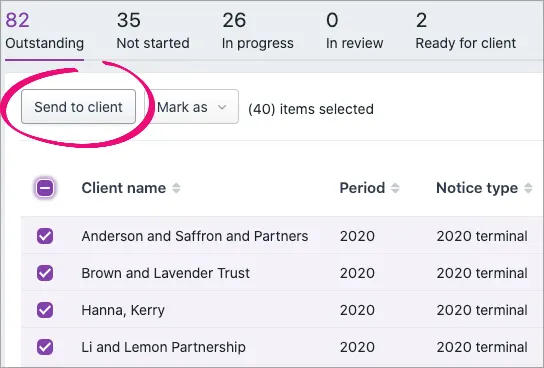
6. Send for review OR ready for client
Once you're happy with the notice amount and calculation, you can select those notices and mark them either as In review if a partner or manager needs to look at them first, or as Ready for client if they are ready to send to your clients.

You can do this either one by one in the individual notices or in bulk from the All clients view of the Tax notices page.
You can export the data to Excel to help with the review process.
Once you click Approve or Ready for client on the tax notice, the Draft watermark is removed from the PDF and a copy is stored in the Documents tab for that client in Practice Compliance.
7. (Optional) Check and approve notices
Once a notice is In review, a partner or manager can view a filtered list of their notices to review them.
The notices can then either be approved or sent for rework.

If the notice is approved, it's locked and a PDF of the notice is saved in the client's Documents tab.
If the RIT calculation changes after the return has been locked, you'll see an alert beside the notice to let you know that the amount may potentially be different.
If the notice is sent for rework, it's unlocked and is moved back to the In progress status.
8. Send notices
Sending tax notices using Tax
To ensure good speed and performance, send no more than 80 tax notices at a time.
Once a notice has been moved to the Ready for client status, you can send it to clients by:
opening each notice and clicking Send to client from within the notice.

selecting multiple notices from the list in the All clients view and clicking Send to client.
When you send tax notices in bulk as a task, the Bulk task assignee will be the assignee of the task. The bulk task assignee may have been set when you created client portals. Otherwise you can edit a client portal.
Practice administrators can edit the default email and Portal task text that’s used each time you send a tax notice.


When the notice status is changed to Sent, either manually or by sending the email or Portal task, an MYOB payment is created. This payment will show as outstanding until it's reconciled against the matching IR transaction.
Checking and reworking tax notices before sending
Open and check the details of tax notices before sending them.
If, before sending the notice, you decide that the calculation needs to be redone (perhaps because of an alert that the calculation basis has changed), you can send the notice for rework.
To send the tax notice for rework, open the client's tax notice from the client-centric view and click Send for rework. This will delete the copy of the tax notice, which was saved when the notice was approved or marked as Ready for client. You can't do this in bulk from the All clients view.
Send a tax notice via email
If you set the Delivery preference to Email when preparing the tax notice email settings, you can send tax notices by email individually or in bulk.
If sending individually, you can click Send to client to review the email before sending it. You can edit the title and content of the email before sending it, and you can add documents.
If sending in bulk, you can send multiple emails in one go. However, you can't edit the subject and wording of the email before sending it as you can when sending emails individually.
The email does not use the Email notification settings found in the Settings on the left menu bar, so you can't add a logo or any branding to the email.
The email will be sent to your client from mail@apps.myob.com, but the reply address on the email will be the one set as your Practice alias address in your practice settings. If the client clicks Reply, the reply will be sent to that reply address. You may want to suggest to your clients that they whitelist this address, to prevent it from being blocked by their email spam filters.
A copy of the tax notice PDF, but not the email, is stored in Documents within Practice Compliance. If you sent the tax notice using the email option and your Practice Administrator has set an email address CC option, that practice email address will receive a copy of the tax notice email that was sent to your client.
-
You may find it useful to set up a shared email address to use as the inbox for tax notice emails. That way, everyone in your practice with access to the inbox can search for tax notices for a particular client.
-
If you use AE/AO and Document Manager, you may find it useful to save the tax notice emails and store them in Document Manager using the Share It feature.
After you've sent a tax notice, keep an eye out for alerts about emails not being delivered. If emails can't be delivered, you'll see an Email bounced notification in the Alerts column in the Tax notices page. The tax notice status will also change from Sending back to Ready for client.

If you've set up a practice alias, you'll also get an email notification to that reply email address telling you that the tax notice email couldn't be delivered.
Learn more about emailing tax notices.
Send a tax notice via Portal
If the delivery preference has been set to Portal, clicking Send to client will create a Portal task. Similar to the email method, you can edit the title and content of the task as well as adding documents as required, and you can send individually or in bulk.
Because it's a Portal task, you can also edit which staff associated with the client will receive the task, who the sender of the email notification will be and who will be notified when the client approves the document. No document is sent by email; the client receives an email notification, and the PDF is shared into the client Portal where they can access and view it.
If the Portal tasks are created using the option to send in bulk, the tasks will be sent to the full access users that you've assigned as the Bulk task assignee when creating or editing the Portal. The tax notice status will be Sending and then Sent when the notification to review the task is sent. Sending can take up to 30 minutes.
There’s also a due date which shows up in the client Portal, so that the client is made aware of when they should make their payment by. If you want to prompt a client to make their payment, you can send reminders from the task associated with the tax notice.
Emails sent using the Portal task will include the logo and disclaimer saved in the Email notification settings that you access by clicking Settings from the left menu bar.
Once your client has made a payment, go to your Portal Tasks list, open the task and mark it as complete. To help you find the task you're looking for, you can filter by client name, partner, manager, accountant (the task creator) and status.
Learn more about sending tax notices as Portal tasks.
Send a tax notice manually
If the delivery preference has been set to Send manually, the Send to client button will be locked and you'll need to click View PDF in each tax notice to view the PDF of the tax notice in a new browser tab. Once opened, you can either print or save the PDF to distribute to the client.
Alternatively, you can download the tax notices from Documents within Practice Compliance, where the PDFs are stored. If you have the new Documents within Practice Management, you can select multiple tax notices and download them in bulk. This downloads multiple PDF files compressed into a single ZIP file that can be extracted and, for example, printed.
Once the notice has been saved and sent to the client, you can select Mark as and choose Sent to move the notice to the Sent status.
The Mark as options only change the status in Practice Compliance. For example, if you choose Mark as > Sent, the tax notice won't be sent to the client. To send the tax notice, you need to select the Send to client button next to Mark as.
You can't send tax notices in bulk when sending manually. You have to download and send each tax notice individually.
Learn more about sending tax notices manually.
9. Check Sent not Paid notices
As the due date of the tax payment approaches, and you receive and reconcile payment transactions from IR, the notice will move from Sent to Paid. As long as it meets the usual business rules, the IR transaction will automatically reconcile against the expected MYOB transaction that was created when the tax notice was marked as Sent.
If the notice doesn't move from Sent to Paid, this means it hasn't been paid. You can see which notices have the sent status by clicking Sent status tab.

You can follow up with those clients to make sure they pay on time to avoid IR penalties. Or you can use tax pooling with that client, in which case you would move the notice back to In progress, which deletes the copy of the notice and the payment transaction. This lets you edit the notice to include the tax pooling, before you resend it or mark it as Not required.