On the Users page (settings menu (⚙️) > Users and permissions), you can update the details access levels of the users that have been invited to your file.

AccountRight users
You edit and delete users in the Users page when you access your AccountRight company file in a web browser.
Click pills across the top to focus on users with specific statuses:

Changing practice user access
If you're an Advisor, add, edit or remove practice staff in your practice software.
Your own user access controls what you can change
Your user type and role determines what changes you can make to other users in your MYOB file. To be able to remove another user's access, you need to have a user type of Owner, Online Admin or Advisor. To make changes to a user’s name or what features and functions they can access in a file (their roles and permissions) you need the Administrator role.
The ability for Online Admins and Advisors to remove another user's access is still being rolled out. If this option isn't in your file yet, the Owner can do it.
More about user type and roles
Editing a user
Depending on your user access, you can change a user's name and access level.
Change a user's name
You can change your own name, but only users with Administrator role and permissions can change another user’s name.
Sign in to MYOB via app.myob.com
Click the settings menu (⚙️) and choose Users and permissions to display a list of all users.
If you need to, filter the list by keyword search or Status.
Click the user's name. Unless you're an administrator, you'll only be able to change your own user name.
Change the user's name.
When you're done, click Save.
Change a user's roles and permissions
Roles and Permissions control the parts of your MYOB business a user or advisor can access. For example, a user with the Sales role can only access sales-related functions and reports. But the Administrator role gives a user access to all features and functions.
Only users with the Administrator role can change another user’s access level. An Administrator can't change their own access level.
Click the settings menu (⚙️) and choose Users and permissions to display a list of all users.
If you need to, filter the list by keyword search or User status.
Click the user's name.
Under Access, select the Roles and permissions for only those areas you want the user to access.
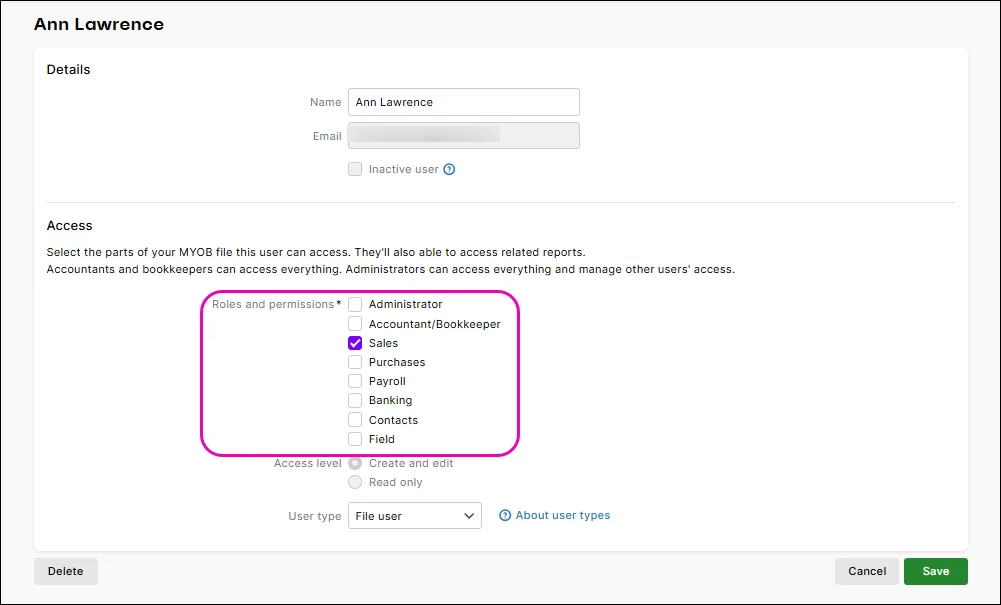
You can select multiple roles if you want, like Sales and Contacts. More about roles and permissions
When you're done, click Save.

Change a user type
A user's User Type determines whether they can access the current file (a File User) or all files with the same serial number (Owner, Online Admin or Advisor).
Owners, Online Admins and Advisors can change the user types of other users. For example, they can change a File User to an Online Admin or Advisor, and they can change an Online Admin to an Advisor or File User.
Need to change the Owner user?
The existing Owner user can transfer the Owner user type to someone else.
You might change the User Type if you have invited your accountant or bookkeeper as a File User or Online Admin. Or, you may want to give Online Admin rights to a File User so that they can access all files under the serial number or apply for a bank feed.
Sign in to MYOB via app.myob.com
Click the settings menu (⚙️) and choose Users and permissions to display a list of all users.
If you need to, filter the list by keyword search or Status.
Click the user's name.
In the Access section, choose a different User Type:
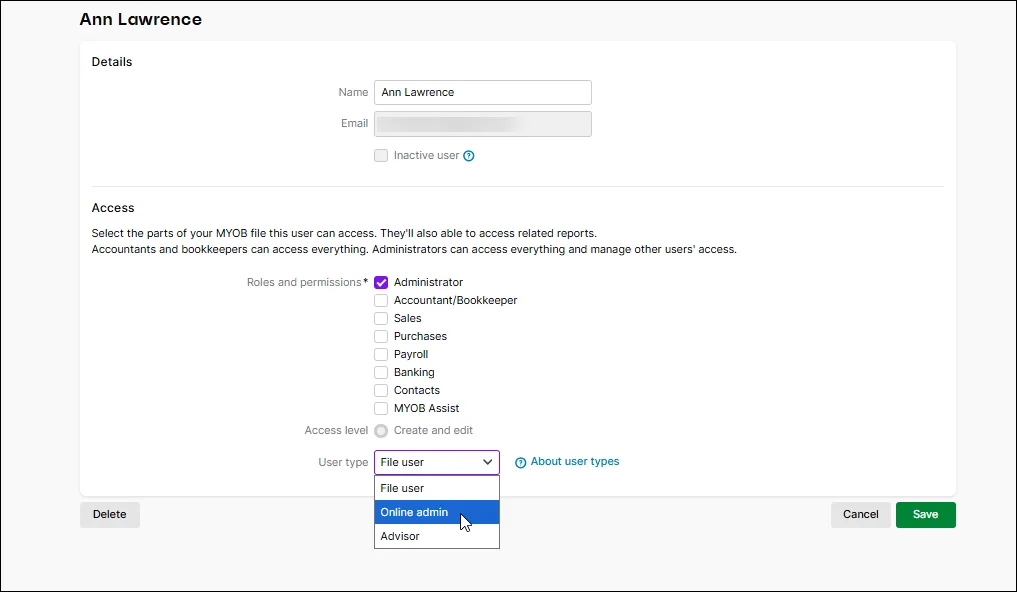
User Type field greyed out? You need to be an Owner or Online Admin user to change the user type.
Click Save.

What happens next?
When you update:
a File user or Online Admin to an Advisor, they will be removed from the Users page and converted to an Advisor login based on the user's email domain.
a File user to an Online Admin, they will receive an automatically generated email that their 'Access to the MYOB Business has been cancelled'. They will now have Online Admin access to the file.
Removing a user's access
There are a few ways to stop someone accessing your MYOB file. The option you choose depends on whether the user has accessed the file yet, and whether you might need to give them access again later:
Make a user Inactive - temporarily turn off a user’s access (to restore their access, just make them active again).
Remove a user's access - stop a user accessing the file, but keep their user record. Use this option for users who’ve already accessed the file. If they need to access the file again in the future, you can send them a new invitation.
Delete a user - remove an invited user who hasn’t started using the file yet (the user's status is Invitation sent). If a user has accessed the file (their status is Active), remove their access or make them inactive instead.
Whose access you can remove depends on your user type
Your user type controls whether you can remove user access for other users. For example, an Owner can remove others, but a File User can't.

The Owner user can't be deleted, but the existing Owner can transfer ownership to another user.
Access removal for certain user types and Owner transfer, are still being rolled out and may not yet be available for your business.
Make a user inactive
If you want to temporarily remove a user's access to your MYOB file, they can be made inactive. This allows you to easily reactivate the user when you want to give them access again. If you want to permanently remove a user's access, see the steps above.
Only an Owner, Online admin or Advisor with the Administrator role can make another user inactive or active. Users who are assigned the Administrator role and permissions cannot be made inactive.
To make a user inactive
Sign in to MYOB via app.myob.com as an administrator.
Click the settings menu (⚙️) and choose Users and permissions to display a list of all users.
If you need to, filter the list by keyword search or Status.
Click the name of the user to be made inactive.
Select the option Inactive user.

Inactive user greyed out?
If you can't select this option, the user you're trying to make inactive is assigned the Administrator role. Change their role to another role, like Sales, save it and reopen their record. You should then be able to select the Inactive user option.
Click Save.

To make an inactive user active again, open their record, deselect Inactive user and click Save.
Remove a user's access
When you remove a user's access, they won't be able to sign in to your MYOB file unless you send them a new invitation. If you only want to temporarily remove their access, make them an inactive user instead (see above).
Only an Owner, Online admin or Advisor with the Administrator role can remove another user’s access.
You can’t remove the Owner’s access – the existing owner can transfer ownership to another user.
To remove a user's access
Sign in to MYOB via app.myob.com as an administrator.
Click the settings menu (⚙️) and choose Users and permissions to display a list of all users.
If you need to, filter the list by keyword search or Status.
In the Actions column, click the ellipsis (...) and choose Remove access for the applicable user.

At the confirmation, click Remove. The user's access is removed. To view them in your user list, click Status on the Users screen and choose the Access Removed option.

If you want to send a new invitation to a user whose access has been removed, click the Access Removed status. Click the ellipsis for the user and choose Resend Invitation.

Delete a user
Use this option when you've invited a user, but they haven't accessed the file yet. If a user has accessed the file, make them inactive or remove their access instead.
Only some user types can delete users. An Owner can delete all users, except Owner – an Owner can transfer their ownership to another user. An Online Admin or Advisor can only delete a File User.
If you can’t delete a user because they have the Administrator role, change their role to a lesser role (like Sales), then try deleting them again.
To delete a user
Sign in to MYOB via app.myob.com as an administrator.
Click the settings menu (⚙️) and choose Users and permissions to display a list of all users.
If you need to, filter the list by keyword search or Status.
Click the name of the user to be deleted.
Click Delete.
At the confirmation message, click Delete.
Deleted a user accidentally? Oops! Just set them back up as a new user.
Replace a sole administrator
If your business has only one user with the Administrator role and permissions, you'll need to create a replacement administrator before you can delete the first one. Administrators can't delete themselves.
Only users with Administrator role and permissions can delete other administrators.
First, create a new user (see Inviting a user to your MYOB business) or choose an existing user and give them Administrator role and permissions (see "Change a user’s access level" above.
Sign in to MYOB via app.myob.com as the new administrator user.
Click the settings menu (⚙️) and choose Users and permissions to display a list of all users.
Click the name of the old administrator (the one being replaced).
Do one of the following:
If you want to | Do this |
|---|---|
keep the old administrator but remove their administrator access | deselect the Administrator access and select their replacement access level. |
make the old administrator inactive | select the Inactive user option |
6. When you're done, click Save.
Change your sign-in details in My Account
If you need to change your sign-in email address or password, you can do this in the Account security section of My Account.
Change your login email address
Log into My Account with your current email address and password.
Click the dropdown menu in the top-right corner and choose Account security.
In the Sign in section, click Change for the email.
Enter the new email address and password.
Click Submit.
If prompted, complete two-factor authentication.
Log in using the new email address.
Change or reset a password
If a user needs to change or reset their password, the process is similar.
Sign in to My Account with your current email address and password.
Click the dropdown menu in the top-right corner and choose Account security.
In the Sign in section, click Reset next to the Password. An email is sent to the email address you sign in with.
Click here in the email and follow the onscreen prompts to reset your password.
Changing the Owner user
For security reasons, you can’t remove the Owner’s access – the existing Owner can transfer ownership to another user. They can do this in the Users.