Add or remove lines in your invoices and quotes to display exactly what you want—in the right order.
This includes:
inserting blank rows—to add some space or headings between your line items
inserting line items—to add more items or services
removing a line—to just make it go away
moving lines up or down—to change the order they're listed.
You can do this when you're creating or editing an invoice.
To insert a blank row
A blank row can be left blank, or you can enter text. This is handy if you want to enter additional details about a line item, or add a heading.
Display the invoice.
Click the ellipsis button in the line above where you want the blank row and choose Insert blank row.
To add text, click into the blank row and type away. You can add up to 1000 characters of text in a blank row.
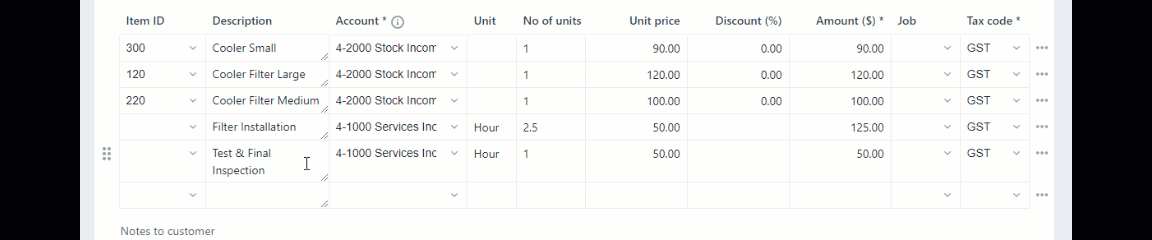
To insert a transaction line
Need to add some extra items or services to your invoice? Easy—just add a line item.
Display the invoice.
Click the ellipsis button in the line above where the line item is to be added and choose Insert line item.
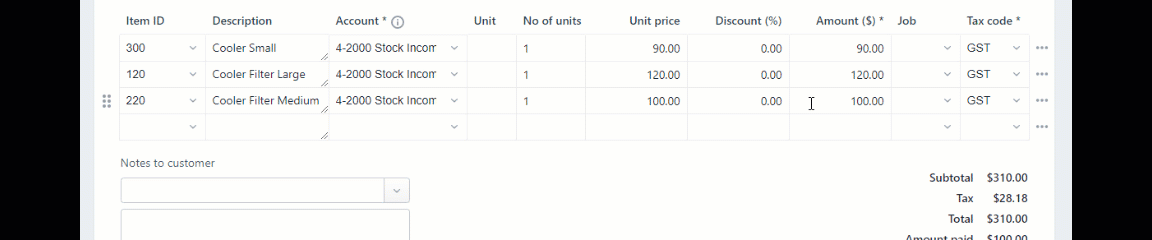
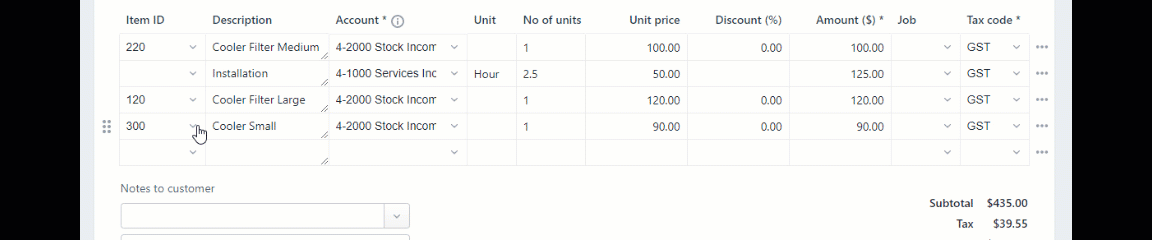
To move a line
Everything has its place, so feel free to change the order of the lines on your invoices.
Display the invoice.
Click the drag handle to the left of the line and drag and drop it to a new position.
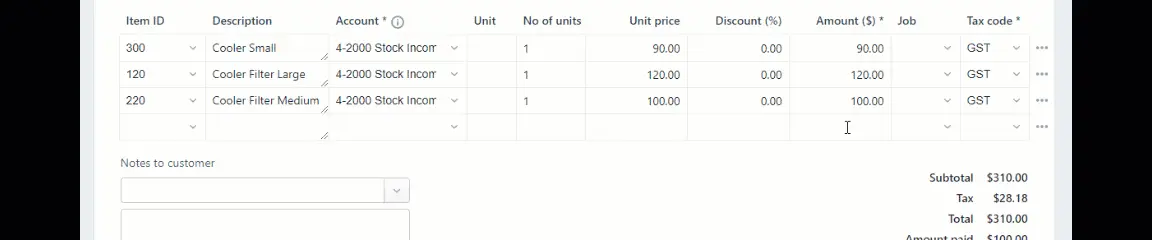
To remove a line
If there's a line on an invoice or quote you don't need, you can get rid of it—no questions asked.
Display the invoice.
Click the ellipsis button in the line and choose Remove.
When entering a sale, here's how to add blank lines, transaction lines, headers and subtotals.
To insert a blank line
A blank line can be left blank, or you can enter text that will appear on the printed form, such as additional details about the line item.
In the Sales window, click in the line below where the line is to appear.
Go to the Edit menu and choose Insert Blank Line.
Use shortcut keys
Use the shortcut keys CTRL + SHIFT + L to easily insert a blank line.
To insert a transaction line
Add a transaction line if you need to enter more services or items than are allowed for on the screen.
In the Sales window, click in the line below where the transaction line is to appear.
Go to the Edit menu and choose Insert Transaction Line.
Use shortcut keys
Use the shortcut keys CTRL + SHIFT + I to easily insert a transaction line.
To insert a header
You can group several line items by inserting a header. For example you may want to separate 'materials' and 'labour'.
In the Sales window, click in the line below where the header is to appear.
Go to the Edit menu and choose Insert Header. A blank line will appear in the scrolling list.
Type the text for the header in the Description column.
Press Tab to complete the header entry. The text appears in grey.


Use shortcut keys
Use the shortcut keys CTRL + SHIFT + R to easily insert a header.
To insert a subtotal
In the Sales window, click in the first line below the items to be subtotalled.
Go to the Edit menu and choose Insert Subtotal. A line appears displaying the subtotal of the amounts that appear above the subtotal line and below the last subtotal, if there is one.


Use shortcut keys
Use the shortcut keys CTRL + SHIFT + S to easily insert a subtotal.
To delete a blank line, transaction line, header or subtotal
In the Sales window, click anywhere in the blank line, transaction line, header or subtotal you want to delete.
Go to the Edit menu and choose Delete Line.
Use shortcut keys
Use the shortcut keys CTRL + SHIFT + D to easily delete a line.